Pages

Samsung Galaxy Note 3: benchmark tricks are lame attempt to gain critical acclaim

samsung galaxy note 3 banner

Samsung is hardly lagging behind the pack when it comes to smartphone sales.

The most recent Gartner figures showed it was well in the lead, with 31.7% of smartphone users across the globe packing a device made by the Korean giant.

Critically, it’s also right up there with Apple. Its Galaxy S4 is rightly lauded as one of 2013’s best and the new Galaxy Note 3 isn’t too shabby either.

But it’s that device which sits at the heart of a new controversy, unearthed by the hardcore tech types at Ars Technica.

Their discovery that Samsung has been artificially boosting benchmark figures on the new phablet are incendiary and show just how dirty even the biggest players are willing to fight in order to stay on top.

The premise is somewhat convoluted.
snapdragon 800 processor
When running a popular benchmarking app, the Galaxy Note 3’s CPU goes into a special boost mode, showing it to be clocking up far more impressive figures than rival devices that use exactly the same Qualcomm Snapdragon 800 chip.

Ars used the Geekbench app and then tweaked it to trick the Note 3 into thinking it was just a standard benchmarking tool that isn’t used by many tech fans.

The results showed Samsung was artificially pushing up the Note 3’s benchmarks by a colossal 20%.
Why does this matter? Well, for a start it throws into question the whole point of benchmarking a device.
By and large, it’s a handy means for hardcore tech fans to see how snappy a phone really is.
samsung galaxy note 3 official 1

But it’s also a way for Samsung to show off that its device is faster, and therefore better, than its rivals.
Some might call it fraudulent. Others might say it just shows how lame Samsung is being in trying to push its flagship product.
Samsung could easily big-up the amazing screen, heaps of proprietary apps and the fact it works with the new Galaxy Gear watch.
Instead, it’s using underhand means to make the phone look better than it really is.
Frankly, that extra speed is something that most mainstream users couldn’t care less about.
samsung galaxy note 3 stylus
Why Samsung feels the need to pull this move, when there are technically savvy web users able to suss it out is beyond comprehension.
It feels tacky and undermines the product completely. Doubtless, rivals will have tried to pull the same trick.
So, from now on, let’s focus on what a phone can do rather than simply how fast it can do it.
We should aim to guarantee that whatever modern device you buy, it’ll be zippy enough for your needs.

How to Root Galaxy Note 3

Download this video for viewing in HD on your smartphone or computer. Click Here to Download High-Quality HD video to your Smartphone or Computer.


This video was brought to you by AndroidRoot.org. Click Here to See at AndroidRoot.org
There’s already a working CWM recovery which means you may be able to easily root your brand, new Galaxy Note 3 easily.
Although we do not have the device yet (it will be coming in 2 days), here’s an outline of steps you must do to root your Galaxy Note 3.
Currently this root guide is for Windows only (or use VMWare for Linux/Mac) but I will have an updated Mac/Linux guide soon.
Step 1. First, make sure you have either SM-N9005, SM-N9006, SM-900, Sprint SM-N900S, or T-Mobile SM-N900T model Note 3.
(Currently there’s no root available for AT&T Note 3 SM-900A as bootloader is locked but we should have a solution soon.)


Download the following files:

Download appropriate CWM recovery for your Note 3 (Make sure you download the CORRECT version for your Note 3 model!!!)
Download ODIN program and unzip.
Download SuperSU zip file
Download and install Samsung USB drivers


howto-root-galaxynote3-1
Step 2. Turn off your Note 3.

Step 3. Hold down, Volume Down, Center Home, and Power buttons together for about 2-3 seconds then let go of all buttons when you see a warning screen like below:
howto-root-galaxynote3-2
Then hit Volume Up button to enter Download mode.
howto-root-galaxynote3-3
Step 4. You should now see Download mode. This is the ODIN download mode where you can use ODIN to install custom recovery.
Step 5. Plug a micro-USB cable from your Note 3 to your computer.
howto-root-galaxynote3-4
Step 6. Run ODIN program you downloaded earlier in Step 1. (only for Windows or use VMWare on Linux/Mac).
howto-root-galaxynote3-5

You should see a yellow-highlighted box with a random COM number in ODIN program.  If you do not see it, download and install Samsung USB drivers then unplug/re-plug the micro-USB cable.
Also, you may have to use a USB 3.0 cable supplied with your Note 3, try plugging it in a USB 3.0 port first and if that doesn’t work plug it into a regular USB 2.0 port.  One of them should work.
howto-root-galaxynote3-6
Step 7. DO NOT TOUCH ANYTHING ELSE but choose “PDA” in ODIN program then find the CWM recovery .tar file you downloaded earlier then hit Start button.
howto-root-galaxynote3-7
howto-root-galaxynote3-8
howto-root-galaxynote3-9
howto-root-galaxynote3-10
Step 8. Your Note 3 should now reboot. When rebooted, copy the SuperSU zip file you downloaded in Step 1 to your Note 3 internal storage.

howto-root-galaxynote3-11
Step 9. Turn off your Note 3.
Step 10. Hold down, Volume Up, Center Home, and Power buttons together for about 6-7 seconds then let go of all buttons
.
howto-root-galaxynote3-12
Step 11. You should now be in CWM recovery. Choose “Install zip”, then “Install from sdcard”, then choose the SuperSU zip file you downloaded earlier.

howto-root-galaxynote3-13 howto-root-galaxynote3-14 howto-root-galaxynote3-15 howto-root-galaxynote3-16 howto-root-galaxynote3-17
Step 12. Reboot and your Note 3 should be rooted.  You can verify by downloading and running Titanium Backup app from Play Store.

howto-root-galaxynote3-18

Q&A

Q: Will this erase any apps or settings on my Note 3?
A: No, this root method does not touch your apps or settings, it simply installs custom recovery such as CWM or TWRP then root using SuperSU zip file.

Q: Will rooting void my warranty?
A: Most likely yes but there may be a way to unvoid your warranty in the near future (as happened with Note 2),


 NOTE: THE AUTHOR OF THIS SITE IS NOT RESPONSIBLE IF YOU MESS UP YOUR PHONE, PLEASE READ INSTRUCTIONS TWICE BEFORE TRYING IF THIS IS YOUR FIRST TIME TO ROOTING AND CUSTOM ROMS!

Galaxy S4 “hidden” features

In a new blog post, Samsung describes ten “hidden” or “semi-secret” features of the Galaxy S4, which some of you may not be aware of.
Coincidentally or not, the Samsung post went live on the same day Verizon and Motorola unveiled new Droid smartphones, and a day ahead of the upcoming Nexus 7 announcement.
Here are these semi-secret Galaxy S4, as tipped by the company:


1) Swiping down with two fingers offers access to the full Quick Settings panel. (How: swipe down from the status bar with two fingers. Touch and hold to access settings. Long-tap an icon to drag it into a different place.)
Galaxy S4
Galaxy S4 Quick Settings | Image credit: Samsung

2) The TV remote control can be added to the notification panel for quick access. (How: Application screen > WatchOn > Settings).
Galaxy S4
Galaxy S4 remote control | Image credit: Samsung
3) The keyboard can be pop-up-ed on top of other apps for multi-tasking-like features. (How: With the keyboard active, tap the settings icon on the left of the space bar and then select the pop-up keyboard icon.)
Galaxy S4
Galaxy S4 Keyboard pop-up | Image credit: Samsung

4) A blocking mode can be set up to prevent the phone from ringing on incoming calls and other notifications. (How: Settings > My device > Blocking mode.)
Galaxy S4
Galaxy S4 Blocking mode | Image credit: Samsung

5) A Wi-Fi timer app should help users save cellular data, as the phone will try to connect to available Wi-Fi networks for a specific period of time. (How: Settings > Connections > Wi-Fi > Advanced > Wi-Fi Timer.)
Galaxy S4
Galaxy S4 Wi-Fi timer | Image credit: Samsung

6) With the Adapt Sound function, users can improve (and properly calibrate) the sound quality of their Galaxy S4, especially those people affected by hearing impairments. (How: Settings > My device > Sound > Adapt Sound > Start.)
Galaxy S4
Galaxy S4 Adapt Sound | Image credit: Samsung

7) In-call audio can also be optimized in order to improve call experience. (How: Settings > My device > Call.)
Galaxy S4
Galaxy S4 in-call audio | Image credit: Samsung


8) Video watching on the Galaxy S4 also has some “hidden” features such as pinch-to-zoom (for enlarging and shrinking the image on the screen). Brightness and volume adjustments are available also. (How: activate the bars when touching the left and right side of the screen, respectively.)
Galaxy S4
Galaxy S4 video: pinch to zoom, adjust brightness and volume | Image credit: Samsung


9) The camera can be accessed directly from the lock screen for quicker pictures and videos. (How: Settings > My device > Lock screen > Lock screen widgets > Camera. Feature requires lock screen to be other than pattern of PIN.)
Galaxy S4
Galaxy S4 Camera on lock screen | Image credit: Samsung


10) The lock screen message can be personalized with custom fonts and colors. (How: Settings > My device > Lock screen > Lock screen widgets > Edit personal information; if screen is protected with pattern or PIN lock. Or: Tap and hold the lock screen message and drag it down from the screen.)
Galaxy S4
Galaxy S4 custom lock-screen message | Image credit: Samsung

Galaxy Note 3 Tips & Tricks

#1 – Never lose your S Pen!

The S Pen is integral to the power of the Galaxy Note 3 – not something you want to lose. Here’s how you can set the Note 3 to alert you that you may have left the stylus behind:
  • Go to Settings > Controls > S Pen
  • Uncheck “Turn off pen detection”
  • Check S Pen keeper
This will only work when the screen is off, and if you press “okay” when it warns you once, it won’t warn you again until you redock the S Pen and leave it behind again. So be careful!

#2 – Control your Galaxy Note 3 while wearing gloves

The capacitive screen on the Note 3 isn’t only good for writing and drawing with a stylus, it can also be set to operate while wearing gloves, but you’ve got to enable the option:
  • Go to Settings > Controls > Increase touch sensitivity (it’s the very last option)
  • Turn this ON!

#3 – Type with one hand

The Galaxy Note 3 is HUGE which may turn some small-handed people away, but if difficulty in one-handed typing is a concern, please know you can adjust your keyboard accordingly!
  • Go to Settings > Controls > One-handed operation
  • Check “Use for all screens”
  • Only check other boxes if you want them automatically resized all the time
The S Pen also makes typing with Swype an absolute pleasure… give that a try as well!

#4 – Block notifications while you’re sleeping

You don’t want to miss an important call or text from a family member or friend in case of emergency, but notifications from apps and drunk dialing idiots threaten to keep you up all night. And those stinking LED notification lights are BRIGHT! Luckily the Note 3 has a feature for this specific problem called “Blocking Mode”:
  • Go to Settings > Device > Blocking Mode (the last option)
  • Turn the feature on
  • Press “Blocking Mode” to set options
  • UNCHECK “Turn alarm and timer” unless you want to be late for work
  • UNCHECK “Always” and set the time period you’re sleeping (otherwise turn this feature on/off at night and in the morning)
  • MAKE SURE you set your list of “Allowed Contacts” who can bypass this feature (family, friends, booty calls, etc…)

#5 – Lower the screen saturation and contrast

Is Samsung’s outrageously bright and colorful Super AMOLED screen a little TOO bright and colorful? You can do more than lower the screen brightness and instead tone down the contrast and saturation:
  • Go to Settings > Device > Display > Screen Mode
  • Select “Professional photo” or “Movie” to tone down the screen if you feel the colors are too vibrant
It doesn’t have a huge impact but it can certainly help.

#6 – Vibrations too strong?

The default notification vibrations are pretty darn strong! You can turn them down:
  • Go to Settings > Device > Sound > Vibration Intensity
  • Adjust your incoming call, notification, and haptic feedback vibrations as you see fit!
You can also set your phone to vibrate even when ringing (great if you’re at a bar, party, concert, or other loud place) and change the pattern of the vibration from the same settings area.

#7 – Show the battery percentage in the status bar

It can be really annoying trying to guess how much battery you have left by estimating how much of your little icon is filled up with green. We want numbers! Here is how you can put your exact percentage in the notification bar:
  • Go to Settings > Device > Display
  • Scroll down and select “Show battery percentage”
Ah… much more helpful.

#8 to #12 – Motion controls annoying? Only enable these!

Samsung has a boat load of features that detect your eyes and your hands and attempt to behave automatically based on your intents. Most can be annoying but some are pretty useful. I recommend turning ALL of them off except the following. Go to the Settings > Controls >  Motion Control section for all of the below:
See notifications without touching your phone!
Air gesture > Quick Glance > On. Wave your hand over the screen for a quick look at notifications. (Turn Air jump, Air browse, and Air call-accept off)

Added Stylus hovering functionality!
Air view mode > On > Auto. This provides extra features when hovering over items with the S Pen, for example popping up larger images when browsing the gallery or scrolling pages up/down. Open “Air view pen options” to see exactly where it works.

Special Air Command Features!
Air Command > On: Quickly add recent attachments and frequent recipients by hovering over these respective fields

Turn both Motions & Palm Motions OFF
Prevent screen from sleeping when you’re looking at it!
Smart Screen > Smart stay > On. Uncheck the rest of these features.


#13 – Search for settings

Already overwhelmed? You can now search your settings to more easily find hidden options!
  • From the home screen press the Menu button
  • Select “Settings”
  • Tap “Search” at the top and have at it! Don’t forget this feature is here… it’s very useful.

#14 – Customize your quick settings buttons

Prefer to have different quick setting toggles in your notification bar? You can change them easily:
  • Pull down the notification bar
  • Tap the square icons at the top right
  • Tap the pencil icons at the top right
  • Drag available buttons to the Notificaion panel (you’ll have to replace an existing button)
  • Re-order as you like by dragging and dropping

#15 to #18 – Customize your lock screen

Your lock screen can be more than just a lock screen… you’ve just got to set it up. You can find all of these options in:
Settings > Device > Lock Screen.
15) Add quick launch icons to your lock screen.
Shortcuts > On. Further customize by tapping the icons and selecting your own quick launch apps!

16) Add widgets to your lock screen
Multiple Widgets > On > Favorite Apps. The “Camera” option is relatively useless since you can set a quick launch icon (above) to your camera and it launches much more quickly and smoothly.

17) Personalize with contact info and personal message
If you lose your phone, it’s helpful if your screen shows your contact information so a good samaritan can help you retrieve your device. You might also want to add a little of your own pizzaz.

18) Create a memo without unlocking
Action Memo on lock screen > On. To create an “Action Memo” without unlocking your phone, simply hold down the S Pen button and tap anywhere on the lock screen twice. An Action Memo note will immediately pop up at your disposal! Make sure the setting is enabled in


#19 to #25 – Home Screen Shortcuts

When you’re on the home screen the following buttons provide extra functionality.
  • 19) Hold back button to enable/disable Multi Window
  • 20) Double Press Home Button for S Voice
  • 21) Hold Home button for Recent Apps and access to RAM Manager and Google Now
  • 22) Press Home Button for My Magazine
  • 23) Swipe up from the home button for My Magazine
  • 24) Hold Menu Button for S Finder
  • 25) Press Menu Button to edit your Home Screens, access settings, and read help docs

#26 – Prevent Air Command from launching when stylus removed

Air Command is greatly, but you might get restless if the menu pops up EVERY time you remove the Stylus. You can choose to turn this off (or toggle to automatically open Action Memo, which is probably more annoying).
  • Go to Settings > Controls > S Pen > Pen detachment options
  • Select “None”

#27 – Capture screen without S Pen & Screen Writer

To get a screen capture without using Air Command, simply hold the Home and Power Button at the same time. You can also prevent the screen captures from entering edit mode by going to Settings > Device > Display > Edit after screen capture (the last option)

#28 – Turn your phone into a Senior Citizen Saver

Did you buy the Galaxy Note 3 for Grandma or Grandpa because they don’t need a telescope to read the print on the HUGE 5.7 inch screen? Make things even simpler by transforming their phone into an incredibly basic layout that’s hard to NOT understand.
  • Go to Settings > Device > Easy Mode
  • Turn it on!

#29 – Display your app drawer in alphabetical order

If you’ve got a ton of apps, flipping through page after page to get to something specific can be a hassle. You can change the layout of your app drawer very easily to make it more convenient:
  • Open you app drawer
  • Press the menu button
  • Press “View type”
  • Select either “Alphabetical list” or “Alphabetical grid” depending on your preference

#30 –  Unlock your phone by saying “Hi Galaxy”

I’ve seen many people complain that saying “Hi Galaxy” won’t work and they can’t find the option in the Note’s settings. That’s because the option is actually hidden in the settings of the S Voice app!
  • Open S Voice (double tap Home Button or open from your app tray)
  • Press the Menu button
  • Select “Settings”
  • Check “Wake up command”
  • Turn “Voice wake-up” On to activate S Voice even while the screen is off!
Note: “Hi Galaxy” won’t simply unlock you’re phone… it must be followed by a voice command to become useful (see below)

#31+ –  Master the voice commands!

Create and use your own Voice Commands
In addition to all of the default voice commands (see below), you’re able to set 4 custom voice commands (using your own voice) that will trigger actions from the lock screen (display must be on)!

  • Go to Settings > Device > Lock Screen > Wake up in lock screen
  • Turn this ON
  • Tap one of the “Wake-up function” items #1-4
  • Tap “Change function” to select an action when your keyword is spoken out loud. Select from one of the following:
    1. Unlock
    2. Check for missed calls
    3. Check for missed messages
    4. Open Camera
    5. Check Schedule
    6. Play Music
    7. Record Voice
    8. Turn on/off Hands-free Mode
  • Re-enter the same Wake-up function ,tap “Change command”, tap the microphone button, and speak your customized voice command out loud four times.
  • You’re ready to go! Open the lock screen on your display (swipe to unlock) and say your voice command out loud!

Samsung Galaxy Note II secret codes

  • *#06# To check IMEI No.
  • *#9090# - Diagnostic Configuration
  • * #1234# to check software version of phone.
  • *#272*IMEI# - Reset User data + Change Sales Code
  • *#12580*369# to check software and hardware information.
  • *#0228# Battery status (ADC, RSSI reading)
  • *2767*3855# Full factory reset (Don't dial it does not ask you to confirm unless you have problem)
  • *#0*# This Code shows Screen Test Menu (LCD Test Menu) Hidden Menu
  • *#283# Audio LoopBack Control
  • *#07# Test History (SAR Level)
  • *#228# ADC Reading (Battery Status)
  • *#7353# Self Test Mode (2nd Hidden Menu
Works on all Samsung 'Galaxy Series' Smartphones.
Note: We will not be responsible for any damage of your damage!!

How to Paste Text on a Samsung Galaxy S3

How to Paste Text on a Samsung Galaxy S3

In a recent guide I showed you how to "copy on a Samsung Galaxy S3" it now makes sense to show you how to use the copied text to paste it in an e-mail, a text or even a forum post.

The first part is to go to the place where you want to past it. For this example I've decided to use an E-mail though you can genuinely use it pretty much that everywhere where you can find an input screen (the white screen you type into).

After finding where you want to post it you hold your finger in to the input
area (as you can see in the screenshot on the right). After holding your finger there for a second or two you will be given two options you can either "Paste" or "Clipboard". If you click "Paste" it will paste the last thing you selected to copy, if however you selected Clipboard you will be shown number of options from which to select.

As you can see in the image to the left you can select any of the items from the clipboard, this allows you, for example, to copy and paste several different things easily and when you want.


Original post link

Connecting a Samsung Galaxy S3 Smartphone to Wifi

One of the greatest features of modern smartphones is the fact the phones can be connected to Wi-Fi effectively giving you unlimited internet on your phone. Whether you're at work, at home or in somewhere like a Café you tend to be able to get access to a Wi-Fi system somewhere. So it seems to make sense to do a guide to show you how to connect to a Wi-Fi system on a Samsung Galaxy S3.

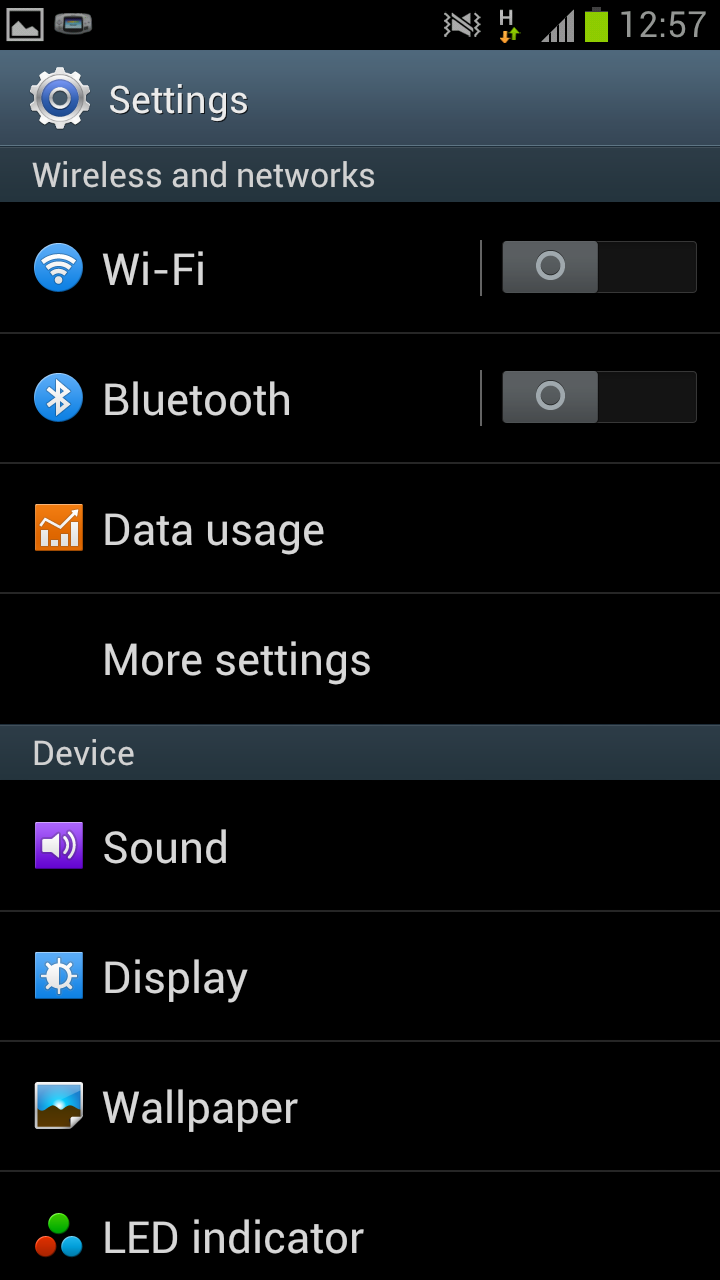
Firstly you need to go to the phones home screen then press the menu button. This will open up a menu like the one in the screenshot on the left. From this menu you need to select the bottom option "Settings".

After clicking on "Settings" you will see a huge list of options allowing you to change almost anything to do with the phone. Rather than scrolling up and down all the options you need to click on the "Wi-Fi". You will then be told to "Turn on the Wi-Fi". To do this you need to drag the grey circle beside "Wi-Fi" across until it turns into a green block.

After turning on your Wi-Fi you again need to click "Wi-Fi" which should do an automatic scan of the area and give you a list of available Wi-Fi connections (as well as storing any you may have previously used). If the phone doesn't do an automatic scan you will need to to select scan from the bottom of the screen to prompt the phone into doing a scan.

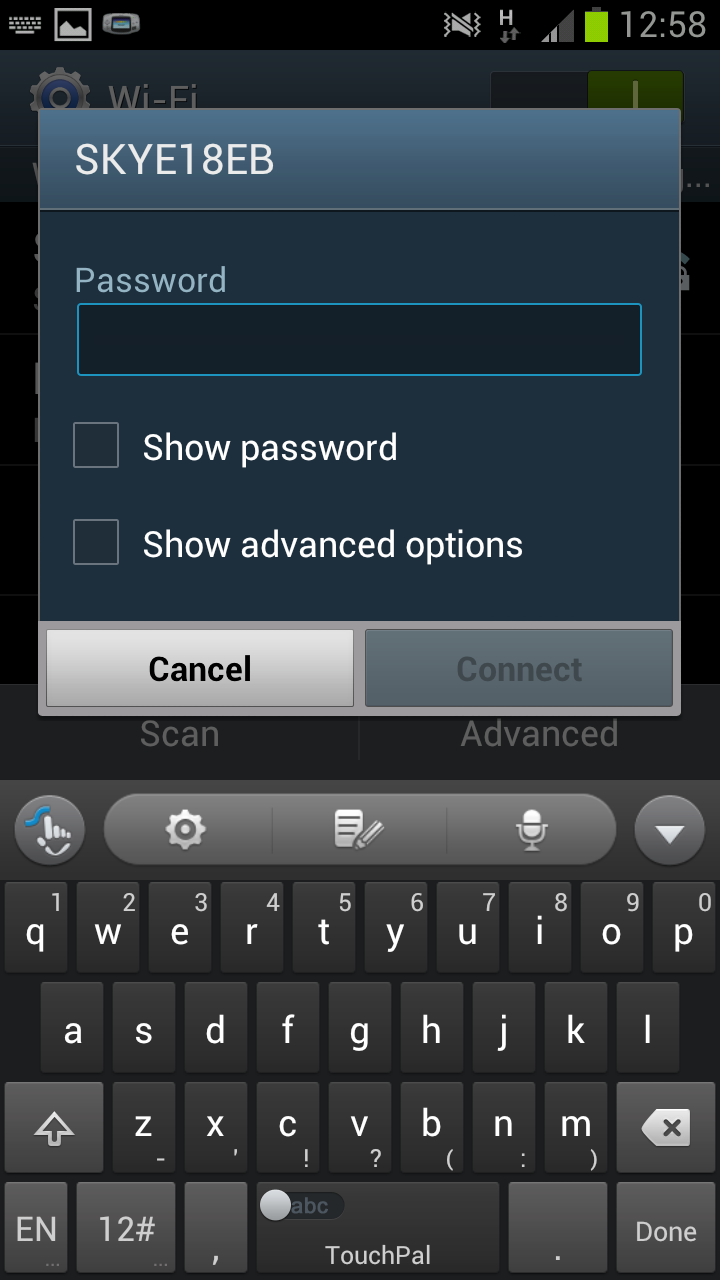
Hopefully when you were doing your scan you found the connection that you
are wishing to use, in my case the connection is the "SKYE18EB" connection, then click on that connection. If the connection then requires a password you will need to enter the password (see the screen shot on the right) an then click "connect".

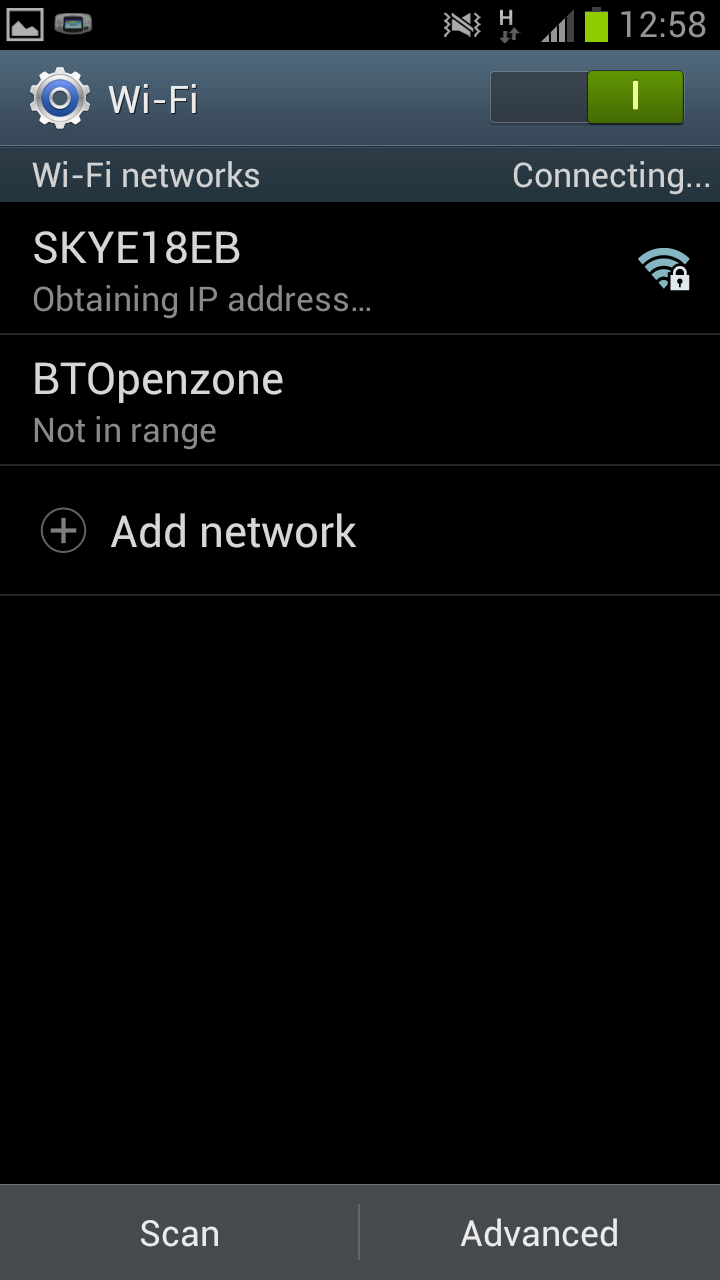
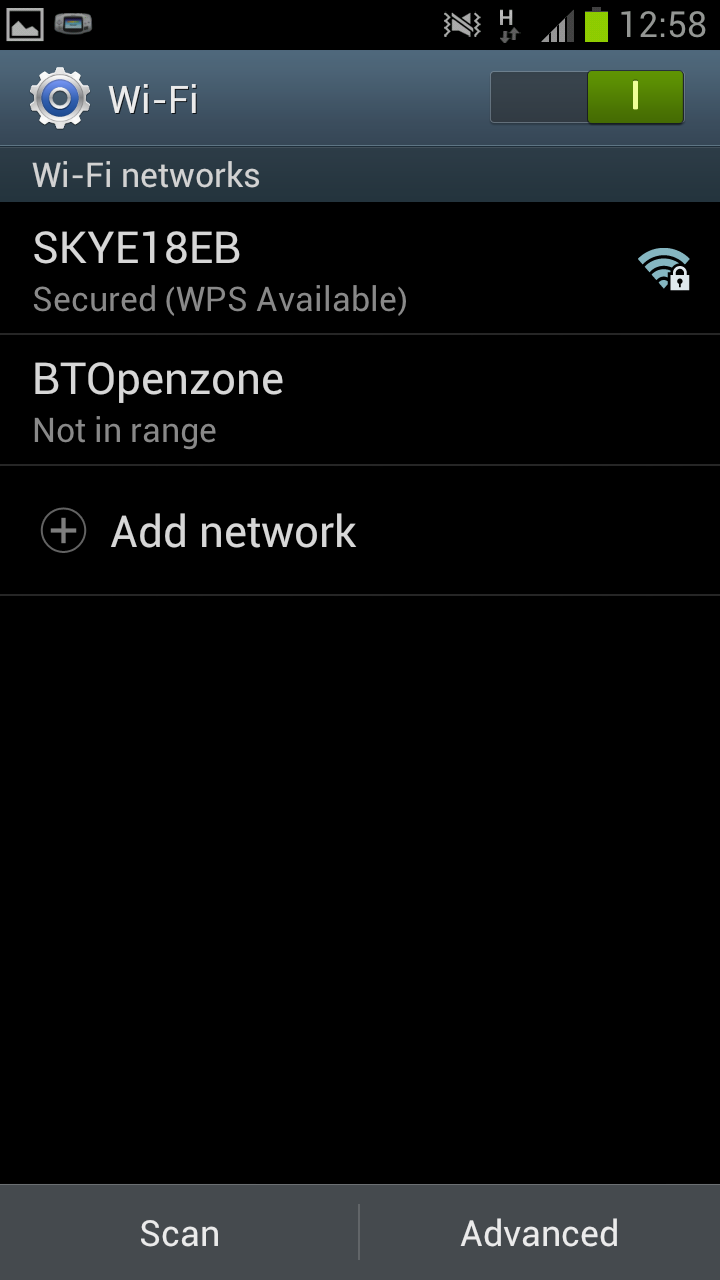
After clicking on connect the connection should authenticate (if you enter the correct password) and then obtain an IP Address. After this has been done you should be able to connect to that connection at will (as long as it's in range). With your Wi-Fi connected you will be able to surf the net, watch videos, use facebook/twitter and anything else you would want to do online, often with a faster connection than the one you'd have via mobile internet.

Note-This guide should work with pretty much all phones running Android 4.0.4.


See also

How to access the test menu on a Samsung Galaxy S3


Despite the Samsung Galaxy S3 being a brand new piece of kit which has only been out for a matter of months, some people will have had issues with it. Thankfully Samsung have given us, the users, a chance to test the various features of our phones via their in built "Test menu", a feature that allows us to check that pretty much every part of our phone works in the correct manner.


 To access the test menu on the Samsung Galaxy S3 you need to open "Phone" app and dial "*#0*#". As soon as you dial the second "#" you will be taken to the Test menu (see the screenshot on the right) which allows you to test many of the features of the phone (as you can see on the right hand side).

Whilst many of the tests are rather complex, or boring a few of them are very interesting and useful. For example the "Touch" test gives you a chance to test that the touch screen works thoroughly, in fact even allows you to "pass" the test.

Despite some of the test being useful, I am a little bit perplexed as to how the "Sensor" test manages to, once again, feature this rather horrifying dog (which was also used in the Samsung Galaxy S3 in a similar manner). Despite it's haunting eyes the dog seems to serve little real purpose.

Whilst I hope no one needs to test their Samsung Galaxy S3 I assume that many will. This allows users to check if the fault is a hardware fault (for example an area of the screen that might be dead) or just an app that isn't working properly, so make sure to test the phone via the menu before taking it to the store.

Link to original post

How to open Excel files on phone or Tablet (Android)


Now there are lot of mobile phones, tablet PC are available in market, technology is increasing in day by day.now a days mobiles are just like a microcomputer. In this article help you to open excel files on your phone or Tablet (Android).


Documents to Go
  • Documents to Go is a android application which Supported file formats include .doc,. docx,. xls,. xlsx,. ppt,. pptx etc.
  •  Includes password protected Word and Excel
  • Google Docs Download, it can view and edit your files from Google Docs directly
  •  Supported languages : English, French, Japanese, Italian, German, Spanish, Portuguese, Brazilian Portuguese,Turkish, Russian, Polish, Czech and Arabic and traditional and simplified Chinese.
  • Send & receive attachments via Gmail and other e-mail applications.
  • Very user friendly.
  • It includes rich formatting features like bold, italics, underline, font color, alignment, bulleted & numbered lists, tables, bookmarks, comments, footnotes, endnotes, track-changes, word count, find and replace, etc.
  • Sheet To Go offers powerful data computation with support for 111 functions, cell, number & sheet formatting, row & column preferences, auto-fit options, freeze panes, sort, cut, copy, paste, undo, redo, charting, etc.
  • Slideshow features is also included in it
  • PDF To Go provides high-fidelity viewing of important reference materials with options for page view, word wrap, auto-rotate, bookmarks, search, select and copy text, and more…
  • sync files to Computer via USB.
  • Total access with support for attachments, memory card support, password-protected files, built-in file browser, and new Live Folder for recently used documents

To the original post 

The “Perfect Smartphone” Myth


Ok, so you’ve finally made the decision to get a new smartphone. Not unlike any other large purchase, choosing a smartphone that is perfect for you can be a daunting task, even for more knowledgeable consumers. “Should I go with an Android? Is iPhone really better? Or should I go with Windows Phone or BlackBerry?”
Today, everyone is looking for the best phone for them, many eagerly searching for the “perfect” phone. Remember when picking a new mobile phone was easy? Simply pick a carrier, choose a phone within your budget, and keep it moving. Now, consumers want a smartphone that is going to mesh well with their lifestyle, but also one that will not become obsolete within a week of purchase or when a new smartphone comes out.
While smartphones have come an extremely long way since their inception, the perfect phone still has not been built, and probably never will be. So what smartphone should you buy? The answer to that question is not an easy one as it varies, and is on a case by case basis. The “perfect phone” an individual chooses is entirely up to them and their wants and needs.
When purchasing a new smartphone, a few things to take into consideration are where you live, what you want to be able to do on it, and features you’ll need/want. Users should make sure their carrier is going to be able to provide a strong signal for service. Some areas may not be able receive the best signal for optimum performance, this will not make for a fast and pleasurable experience. It will quickly become frustrating not being able to use all of your new phone’s features after spending all that money simply because your signal is not strong or fast enough.
The differences in features and apps between the top two smartphone operating systems iPhone and Android is becoming negligible, so it will ultimately come down to individual preference there. The amount of available features and apps for download for both systems are about the same, with only a few OS specific ones. Windows Phone and BlackBerry on the other hand are far behind in available apps, but still have many features sought after and useful for users. Businesses prefer smartphones because they are easy to install simple smartphone monitoring software to compatible iPhone, Android, or Windows Mobile phones.
The choice of a new smartphone may not be as difficult for everyone as it is for others. Many users love their BlackBerry for its physical keyboard and excellent communication features, and wouldn’’t dare give it up for a touchscreen phone. Others love their Windows Phone for its unique interface, ease of use, and convenient productivity features. Some have even simplified their decision to whatever phone is the latest and greatest when their contract is up.
Saying “I want the perfect smartphone” may not be the best phrase for someone looking for a new phone. Instead, consumers need to first find out what they’re looking for in a new phone, and ask themselves “which smartphone will be best for me?” This way, no matter which one they choose, they will be happy with their purchase as it is perfect for them.

Source : mobile-spy

Forgotten iPhone Tricks and Tips


We use the iPhone all the time, there are many tips that could save us time that we forget about all the time. Whether a beginning iPhone user or a long-time iPhone fanatic, here a few tips that you may not know about that could enhance your iPhone experience.


Simple internet browsing in Safari
With the safari internet browser, it is easier to navigate websites than many give the browser credit for. Remember AOL keywords? Safari works similarly, it is called domain resolution. With domain resolution, you don’t need to waste seconds every time you type a web address. For instance, next time you want to visit a website on iPhone’s Safari browser, leave out the “www.” And the “.com” and you will still be able to view the site you were looking for. Just make sure Google is your default search engine and not Yahoo.
Forgotten iPhone Tricks and TipsSimilarly, another tip we seem to often forget is that we get options for the domain suffix (the part after the name of the site’s domain) by holding down the “.com” button. By sliding the finger to “.net, .edu or .org” keys we can quicly convey to the browser which site we’re interested in viewing.


Fast-forward or rewind music and videos.

The standard screen for playing music or videos includes three buttons at the bottom: skip back, pause, and skip forward. To rewind or fast-forward, simply hold down one of the skip buttons in the direction that you would like to go. Also, pressing the album art on a music track is another way to fast-forward or rewind on the iPhone.

Home button tricks
Many may not be aware that the home button is used for more than returning to the home screen or waking the iPhone up from sleep. Actually, there are a few things you can do by double clicking the home button.
If the phone is sleeping or is locked, double-tapping the home button will allow the user to bring up the play, pause, skip, and volume iPod controls above the lock screen. By going to Settings -> General -> Home Button one should see a menu with three options for double-clicking the Home Button: Go to Phone Favorites (favorite contacts), iPod controls, or bring up the home screen. This is helpful because if iPod controls are requested while running any app, the app is not interrupted, the iPod Controls are simply brought to the foreground for manipulation.
Saving Images
I caught someone trying to capture images in their email, and their inefficient method just begged for this obvious solution. When capturing images, some will capture a screenshot, then open the image in an editor to crop out unwanted imagery. Instead, simply touch and hold an image in Safari or in Mail, and an action sheet will pop up asking if the image should be saved.
In conclusion
While these tips and tricks are not entirely unknown, they are easily overlooked and could be costing us precious time daily. Some will find this list rather remedial, but there may be something here that hasn’t been looked at for some time. Hope this helps. If not, then congratulations on being an expert iPhone user!

Source : mobile-spy.com

Android this week: So I bought a Galaxy Note 2…

So I broke down and ordered a Galaxy Note 2 from overseas. Why spend the money when I have a Galaxy Nexus phone and Nexus 7 tablet? A video demo shows how Samsung is further bridging the mobile and traditional computing space and I bought in.
android-this-week
Regular readers of this weekly column know that I typically recap interesting Google Android news from the prior week. Occasionally, I make an exception to cover one specific Android item, and today, I’m doing just that. Why? I ordered a Galaxy Note 2 from overseas on Sunday morning and it should arrive within the week.
Samsung Galaxy Note 2 in greyThe new phone cost me a pretty penny – £449.98 ($727 US) delivered from the UK to the U.S.  – but I tend to buy unlocked devices off contract. I have an invitation to a Samsung press event in late October, which is likely to be the U.S. launch of the Galaxy Note 2 and if I were to buy one at full price from a US carrier, it would likely cost nearly as much anyway.
I certainly don’t need another smartphone — I currently use a Galaxy Nexus with a $45 a month Straight Talk SIM — but the idea of a device with a mix of phone and tablet form factors is intriguing to me. The original Galaxy Note did as well, but I didn’t feel it was enough of a change from my Galaxy Nexus to spend the money. This time around, I feel differently in terms of the form factor, hardware and Samsung’s updated TouchWiz software with more functionality for the included digital pen.
In fact, after watching this video demonstration, it hit me that Samsung is really blending mobile and desktop use-cases like never before and I decided to take the plunge:
A few examples from the demo illustrate what I’m talking about:
  • The new S-Pen and dual digitizer add a new hover view, similar to functionality provided by a mouse cursor on traditional computers. I originally thought this was gimmicky, but the video shows some smart uses. Hover over a calendar event and you get the details without the phone opening a completely new screen, for example.
  • The new multitasking feature that shows two apps on the screen at the same time reduces home button presses and app switching. Until recently, our smartphones and tablets have been single app at a time devices; that changes on the Galaxy Note 2 and previously, the Galaxy Note 10.1. Granted, only certain apps support this feature for now. Still, I see productivity potential here.
  • Related to the two apps on a screen simultaneously is the dock-like app launcher around the 2:07 mark in the video. There’s no need to tap a hardware button and scroll through pages of apps — our traditional smartphone user interface — when you can customize a floating dock and tap or drag an app for usage.
Galaxy Note 2 dimensionsI like that Samsung slimmed the width as compared to the original Galaxy Note. I found that device a smidge too wide for my hand. And the S-Pen was to small for me to use comfortably; the new one is longer and has a more ergonomic design. Along with these changes that further bridge the gap between desktop and mobile computing, the hardware on the Galaxy Note 2 is impressive; possibly the best for any Android phone at the moment.
The 1.6 GHz quad-core Samsung Exynos chip paired with 2 GB of memory ought to make this device blazing fast and it should be helped by the performance improvements found in Android 4.1. The 5.5-inch display uses a 16:9 aspect ratio, making the Galaxy Note 2 look like an oversized Galaxy S III. Gone is the PenTile display in 1280 x 720 found on my Galaxy Nexus (which I find quite good); the Note 2 uses an HD Super AMOLED screen in the same resolution. Pixel density is down by comparison, but I suspect the lack of PenTile will offset any clarity loss. And while I’m fine with the 5 megapixel camera found on my Galaxy Nexus, I’m looking forward to the 8 megapixel sensor and improved camera software in the Galaxy Note 2.
I’ll very likely keep my Galaxy Nexus, mainly because it gets software updates directly from Google as soon as they’re ready. Heck, I kept, and still have, my old Nexus One, purchased in January of 2010 for the same reason. It’s possible however, that a 5.5-inch phone that doubles as a pseudo-tablet could replace my Nexus 7 tablet. That’s one of the many questions I’ll be looking to answer for myself as I review the new Galaxy Note 2. Stay tuned for a video look at the device when it arrives, which of course will be followed up by a full review!

Source : gigaom.com

Why Bloggers Say Android Antivirus Apps Are Useless

If you search “android antivirus” on Google you can find a lively debate on the necessity and efficacy of protecting your mobile phone from viruses with an antivirus app. We’re here with some good news: technically, viruses don’t exist on Android! A virus is a piece of software that can copy itself and automatically spread to other devices, and this kind of replication is not possible on the Android operating system. Thank goodness. But that doesn’t mean you don’t need an “antivirus” app.


The word virus has stuck in the popular lexicon as a common term for all malicious software. For most people, it’s simpler to use a generic term like “virus” rather than memorizing the nuances of a trojan, worm, rootkit, malware, adware or spyware. They’re all bad, and some types of malware do threaten Android devices. So if you see Lookout use terms like “cell phone virus” or “Android antivirus app,” it’s because that’s what people understand and search for when they want to protect themselves. In fact, Google Insights shows that people search much more often for “Android virus” than for “Android malware.” We’re not trying to mislead anyone here, we’re just trying to keep folks informed.


On Android and other mobile operating systems, users can unknowingly download malware-infected apps from an app store, the web, or even from email attachments. Once installed on your phone, Android malware can steal personal information, place charges on your mobile account, track your location and activity or hijack your phone. No, it can’t replicate itself and jump to another device – but you certainly don’t want it on your smartphone.


So yes, there is a growing amount of Android malware out there that you should avoid at all costs. (We even did a report about it.) The good news is that it doesn’t cost anything to avoid it – just download Lookout Android Security + Antivirus for free today. Lookout will immediately scan your Android smartphone or tablet for malware, and then examine every app you download from this day forward. The same free app can also back up your personal contacts and locate your phone on a map if it is lost or stolen. And we think that’s the opposite of useless.

Source : blog.lookout